Thinking about designing your room but worried about how to put fairy lights on the wall without causing damage? Or, you’re probably wondering how to attach fairy lights to the wall without nails.
You’ve landed on the right page! We’ve compiled a few simple yet eye-catching fairy light designs to beautify the walls at home or business establishments.
How To Put Fairy Lights On Walls in 8 Different Creative Ways
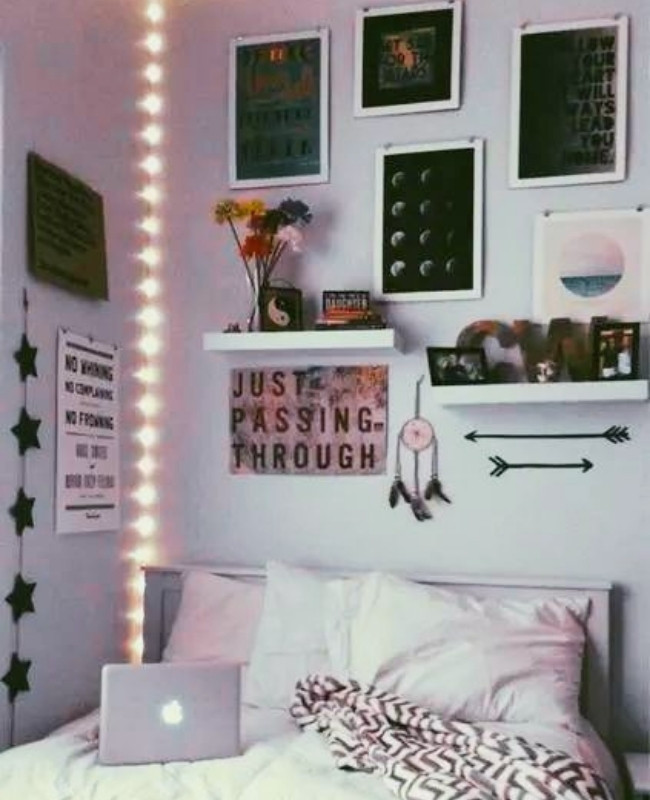
1. How to Accentuate Your Wall With Hanging Fairy Lights
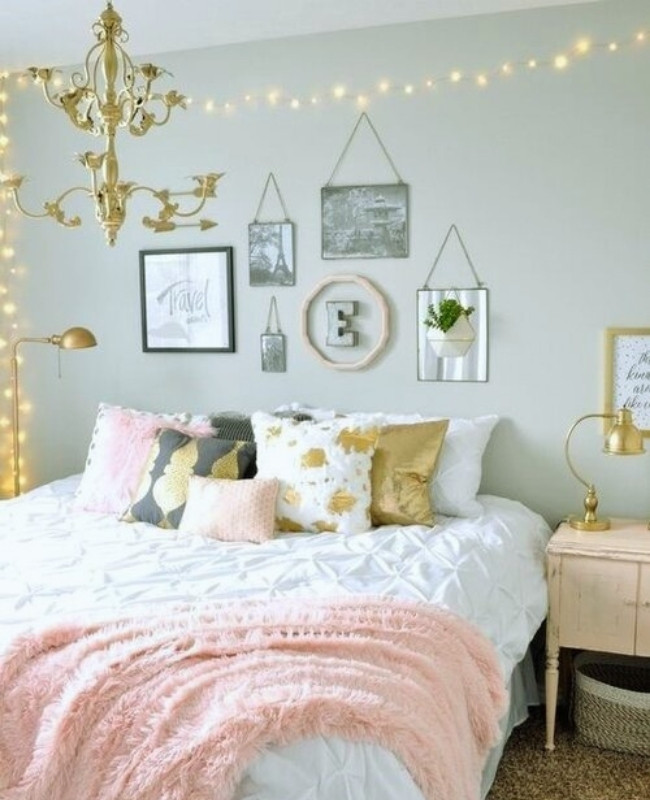
There are multiple ways to put your fairy lights on the wall. And highlighting a room or space is one of them. This can create a magical environment, especially during gatherings.
What You Need:
- Thumbtacks, nails (either for wood or concrete), or adhesive wall hooks
- Tape measure
- Extension cord (if needed) or lighting extension lead designed for your fairy lights
- Fairy Lights
Step 1. Measure the wall length from top to bottom on both sides and across the room.
Step 2. Line up the corners with hooks, thumbtacks, or nails where your lights will run through, depending on your preference.
Step 3. Start putting the fairy light from the power outlet and work your way up to the top corner of the wall. Work your way across the corner and down to the opposite corner.
Tip: Don’t place fairy lights across the bottom part of the floor corners.
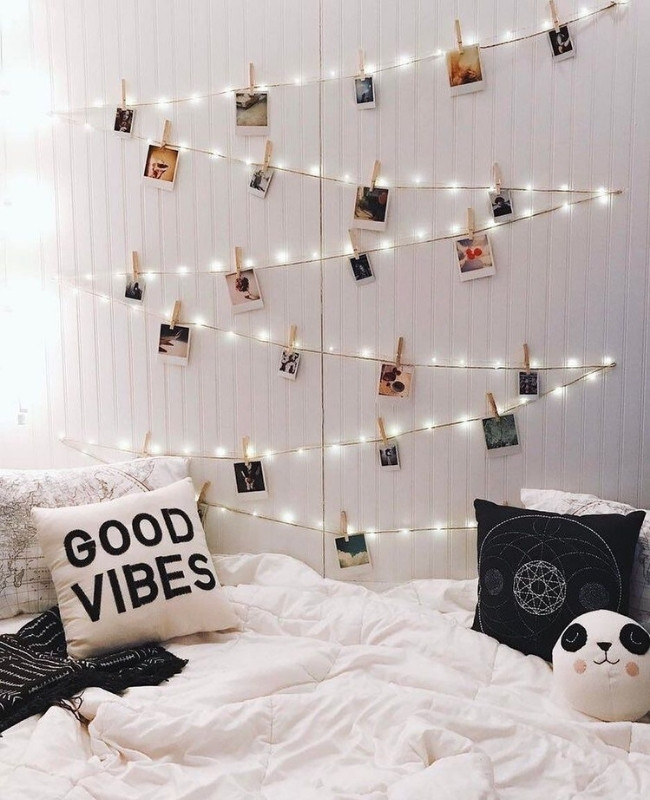
2. How to Highlight Your Room with Photo Clips and Fairy Lights
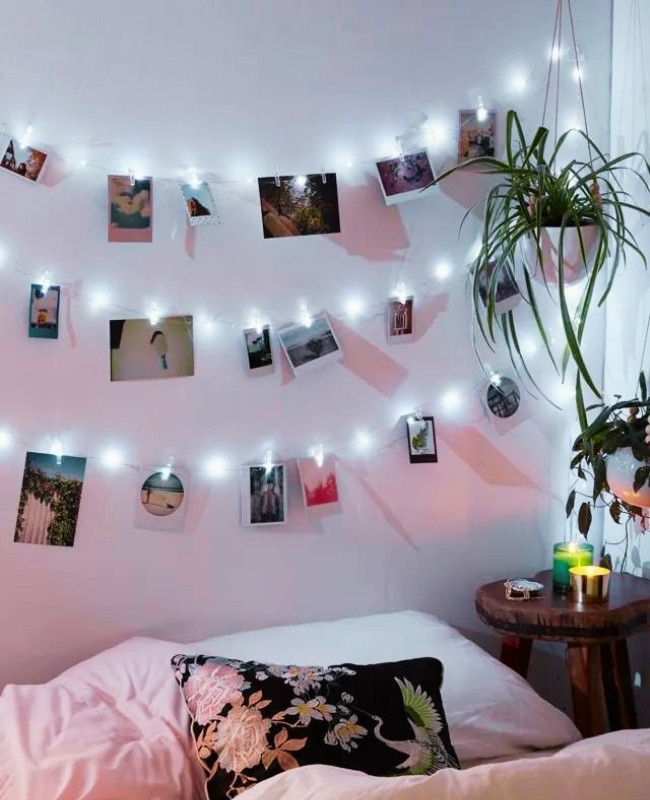
Your photos can do so much more by clipping them on string lights. This will be a great conversation starter.
What You Need:
- Thumbtacks, nails, or self-adhesive hooks
- Fairy lights
- Wooden or plastic clips
- Photos
- Extension cord or lighting extension lead
Step 1. Place the adhesive hooks, thumbtacks, or nails on the wall. The height and length will be based on your preference. You can add more hooks in the middle as added support or design.
The wires can be sagging, creating a wavelike feature, or you can have it taut enough to make it straight across.
A zigzag-like design can also be done from top to bottom. Placing your hooks alternatively from one side to the other.
Make sure to have enough space for your photo in between wires.
Step 2. Attach the fairy lights on the wall starting from the power outlet you will use. Work your way up and across, depending on the preferred height. One can choose to have multiple levels.
You can find several layout designs on the web for more options.
Step 3. Secure your photos on the fairy lights with small wooden or plastic clips. The spacing between photos can be at least 2 to 3 inches apart.
Things to Consider:
- The spacing would also depend on the size of the photos.
- Create a storyline from top to bottom
- Place the date the photo was taken and a few descriptive posts about the picture for an entertaining read for your family and guests.
3. How to Dress Up Your Fairy Lights
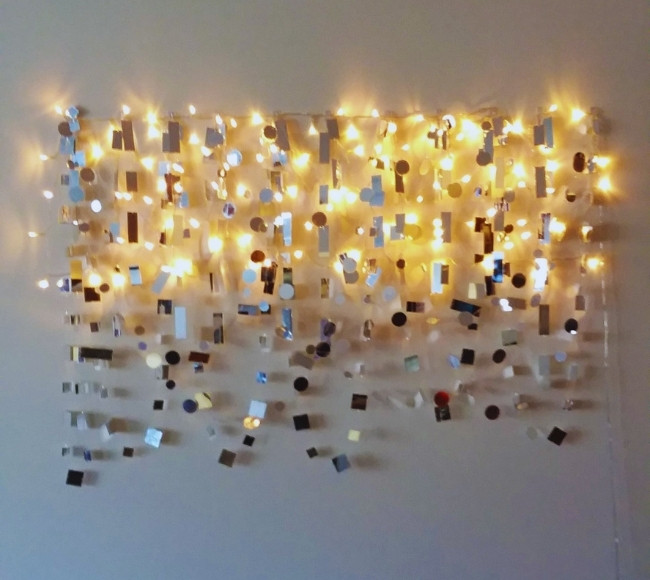
Having fairy lights on your wall is fantastic enough. Dressing them up more with a mirror garland can add more glitter to your fairy lights. The reflections will not only make the lights brighter but also be energy efficient.
What You Need:
- Mirror garland
- Curtain rod set
- Fairy lights
- Extension cord or lighting extension lead
Step 1. Install the curtain rod to the wall.
Step 2. Curl the fairy lights around the rod and let the bottom parts hang loosely. Work your way from one end of the rod to the other.
Step 3. Do the same for the mirror garland.
Step 4. Plug it in and enjoy.
4. How to Make a Lighting Design On Walls

Let your creative juices flow. Make simple images like hearts, circles, or words using fairy lights!
What You Need:
- Adhesive Hooks, nails or thumb tacks, or clear tape
- Carpentry pencil
- Fairy lights
- Extension cord or lighting extension lead
Step 1. Draw the image or lightly write the words on the wall using a pencil.
Step 2. Stick the fairy lights right above your pencil markings. Secure them using thumbtacks or clear tape combined with hooks.
Step 3. Add more anchors or tacks for the parts where the wires loop or curve for better emphasis.
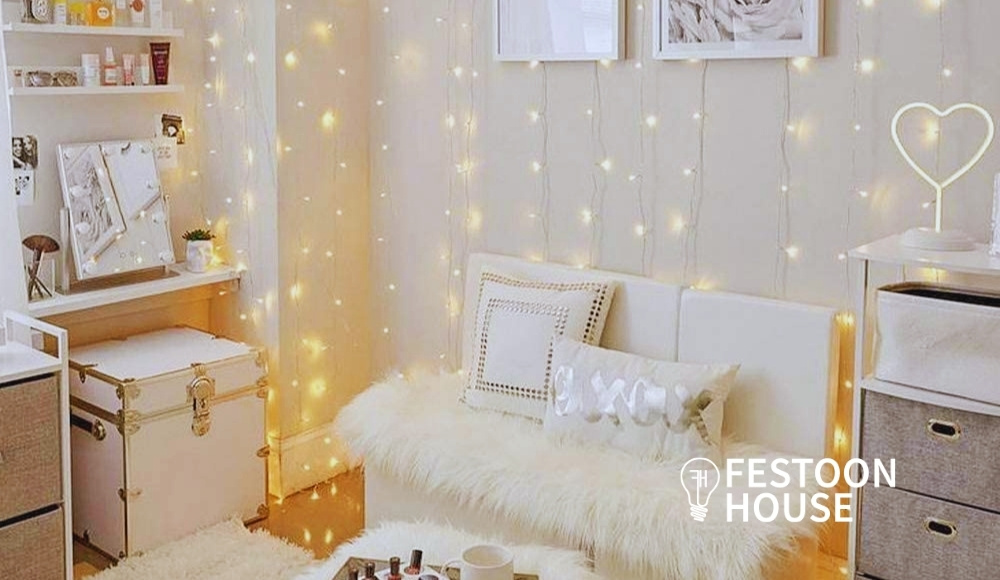
5. How to Hang Curtain Fairy Lights
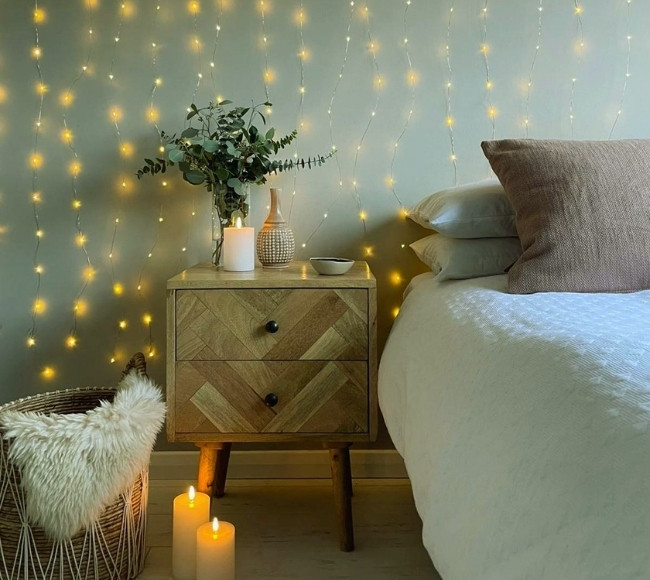
Curtain fairy lights can be an excellent backdrop for party programs at home or anywhere else.
What You Need:
- Fairy Lights
- Curtain Rod or nylon wire
- Curtain rod bracket, adhesive hooks, nails, thumbtacks, or an adjustable nail-free curtain rod holder clip
- Extension cord or lighting extension lead
Step 1. Determine the height and width of the wall area you want to cover with fairy lights.
Note: If you want to add a sheer curtain, the height will depend on the length of the curtain. There should be an inch or two spacing between the lowest end of the curtain from the floor.
Step 2. The next step will depend on what you will use:
a. Curtain rod set.
i. Screw in the curtain rod bracket on both ends of the rod.
ii. With a helping hand, you can use a leveller to ensure the brackets are aligned.
b. Nails
i. Hammer the nails at a 45-degree incline on both ends, depending on the length of the curtain rod.
c. Adjustable nail-free curtain rod holder clip
i. Clean the surface from dust. Wipe it with a damp cloth and then follow it with a dry one.
ii. Measure the distance from the ceiling on each adhesive rod holder clip so they are both at the same height.
iii. Remove the plastic backing and press the clip on the wall for about 30 seconds for maximum hold.
Step 3. When using adhesive hooks, thumbtacks, or nails for your fairy lights, space each at least 2 inches apart.
Step 4. Attach the fairy lights to the wall starting from the power outlet. Then work your way up to the first hook.
Sling the wire around the hook or nail, or secure it with a thumb tack, then let it hang loosely down to the floor. Leave a few more inches lying on the floor for added visual effect.
Work your way back up to the next hook or nail, or push in another tack between the wires. Keep doing the same procedure until you reach the last hanging point of the fairy light.
For steps 5-7, these steps are added if you want to add a sheer curtain fabric. If not, skip these steps.
Step 5. Insert the curtain rod through the eyelet (grommet) sheer curtain
Step 6. Place the curtain rod on the clip, hook or nail you set up for the said purpose.
Step 7. Draw the curtains or stretch them out to give a plain ironed-out look.
Step 8. Plug it in and enjoy your work.
RELATED: How to Hang Fairy Lights On Ceiling
6. How to Light Up Your Fixtures
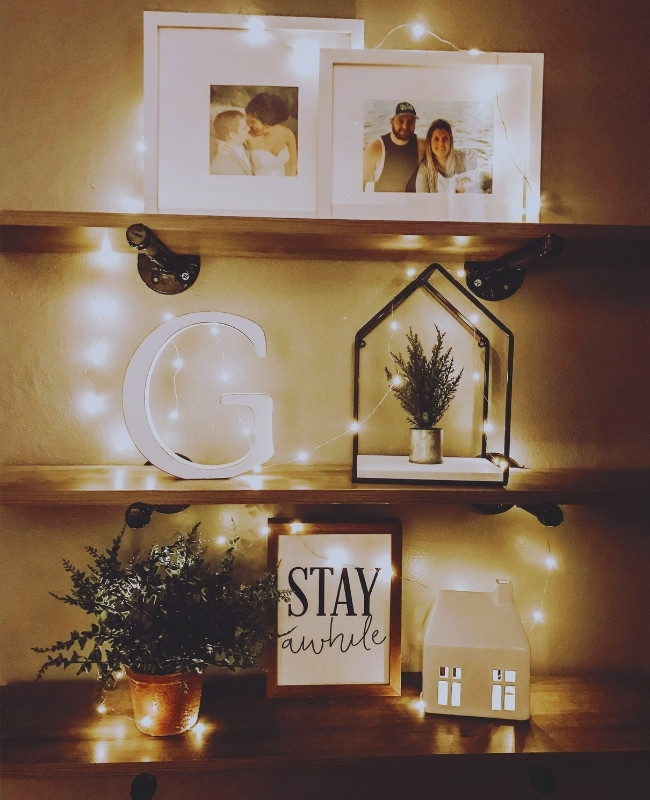
Highlight fixtures that are placed against your wall. For cupboards or broad-sided shelves, you can wrap your fairy lights around them for an accentuated look.
What You Need:
- Fairy Lights
- Extension cord or lighting extension lead
- Clear Adhesive Tape
Option a. For single shelves – place the lights from the side to the front edges.
Option b. For a whole shelving unit – lay out the lights on the side and the top edges
Option c. Freestyle by following the shelf design
7. How to Add Glamour to Mirrors Using Fairy Lights
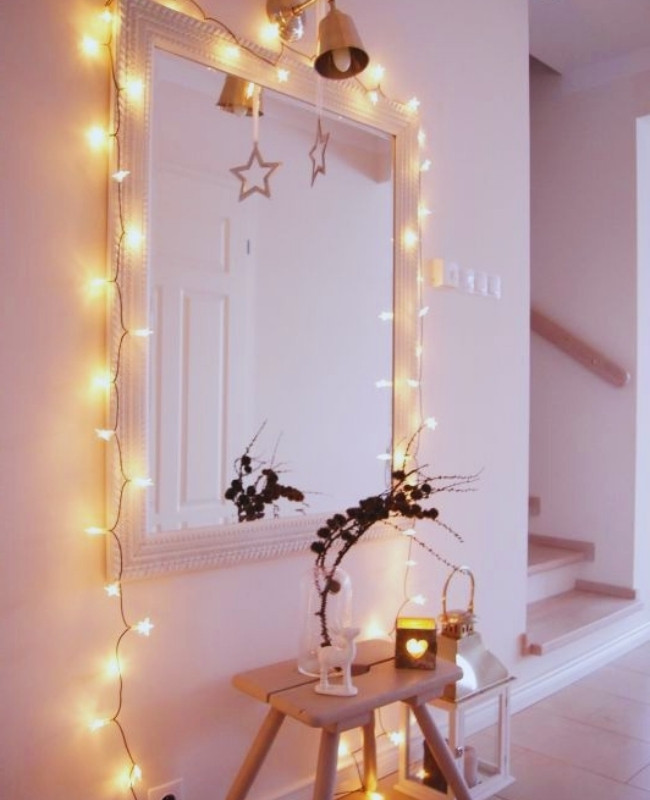
Adding fairy lights is an ingenious way to have balanced lighting around your mirror. You won’t have to deal with unwanted shadows when putting on make-up or simply checking yourself out.
What You Need:
- Fairy Lights
- Clear Adhesive Tape
- Extension cord or lighting extension lead
Wall Mirrors With Flat Wooden Or Metal Frames
Step 1. Use clear adhesive tapes to secure the wires in between lights around the mirror
Step 2. Let the bulbs peek out from the edges.
Wall Mirrors With Round Tubed Edges
Step 1. You can wrap the fairy lights around the tubes on the sides for a fuller look on the frame.
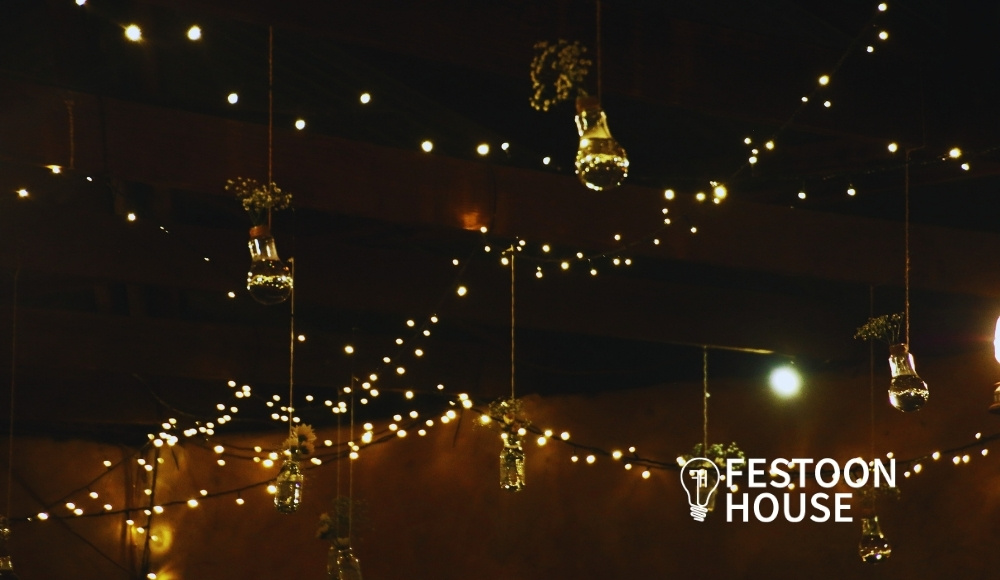
8. How to Add DIY Sconces With Wooden Boards
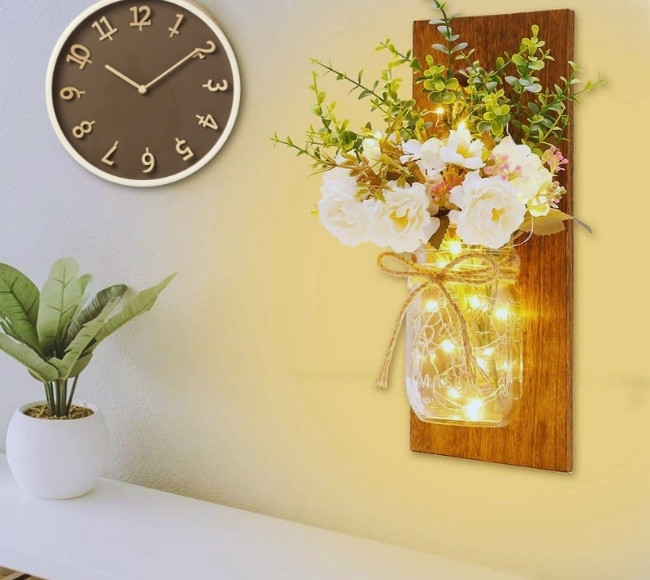
This is a brilliant way to place fairy lights on your walls other than just laying them out across the partition. Using mason jars is a classy way to highlight your walls, especially if it’s a corridor or a hallway.
In addition, the flower design adds some flair to the lighting decor. Moreover, you won’t have to worry about the flowers drying up or watering them since they are dried.
What You Need:
- Short fairy lights. Battery operated if possible.
- 16 oz. Mason jars with or without lid
- Various dried flowers or stems for a fuller look on the flower display
- Wood boards
- Nails or heavy-duty adhesive hooks
- Hammer
- Hose clamp that will fit the neck of the jar
- Carpentry pencil
- Tape measure
- Sandpaper (smooth or small grain)
- Electric drill
- ¼ inch drill bit
- ¼ inch screws (this will be used for each hose clamp)
- Any wood slabs you don’t need. This will be your base for drilling your wood boards.
- Glue gun with a glue stick
- Picture hangers as a substitute for the hooks you will be hanging (the number of pieces will depend on the number of mason jars you will be hanging)
- Burlap ropes
Step 1. Place the mason jar at the centre for reference when you measure the wooden rectangle. Use the pencil to mark the distance.
Note: For a jar with a 5-inch height and 3-inch diameter, the wooden board should have 5.5-inch width and 13.75-inch length.
Step 2. Saw the boards in a rectangular fashion based on the measurements drawn.
Tip: Before sawing, place a rubberized tape across the board where you are going to saw. This is to avoid any wood spurs and to save you time from trying to get rid of them and smoothing them out too much.
Step 3. Lay out your wooden slabs and place your mason jar. Mark the middle part just behind the neck of the jar with a pencil. Then drill a hole. This hole is for the screw that will hold the hose clamp.
Step 4. Screw in the picture hooks on the backside of each wooden board. Make an allowance of ½ inch from the edge. This is where you will tie your burlap ropes for hanging.
Repeat the process for all the boards.
Step 5. Secure the hose clamps on the boards by screwing them in on the holes you drilled in step 3.
Step 6. Secure the mason jars by inserting them into the hose clamps. Align the clamp on the neck of the jar. Then tighten.
Tip: You can place flat rubber brands around the neck of the jar to prevent it from cracking when tightening the clamp.
Repeat the process for each jar.
Step 7. Cover the hose clamps with burlap strings. Once the whole clamp is covered, end the design with a bow on the front.
Step 8. Stuff the battery-operated fairy lights in each mason jar.
Step 9. Place the dried flowers and add a few dried stems to give them a fuller look.
Step 10. Using adhesive hooks or nails, place them on each of the walls you wish to attach the boards. The distance will depend on your preference.
- To determine the distance of jars based on the glow emitted, here’s how:
- Do this at night or close up all the curtains to simulate the nighttime ambience.
- Line up the jars with fairy lights turned on inside. You can have the glows as:
- Overlapping
- Just meeting the edges
- Create a slight shadowy gap in between.
Step 11. Hang the DIY mason jars with fairy lights on each side. The placement can be adjacent or alternate. The choice is yours.
How to Put Fairy Lights on Wall — Additional FAQs
How to Attach Fairy Lights to Wall Without Nails
The use of nails on your wall can be unsightly. You can also end up creating hammer dents on your wall in the process of nailing those buggers down. Worse, maybe hammer your fingers or get hit on the face with a flying nail if not done right.
Here are a few options and alternatives to hang your fairy lights without using nails:
- Drawing pins
- Blu-tack
- Wrapping around household objects
- Damage-free Adhesive Hooks
Can you Hot Glue Fairy Lights?
One of the ways to put fairy lights on the wall is by using a hot glue gun. Yes, you read it right. You can use hot glue to stick the fairy lights on the walls if it is impossible to use nails and other alternative materials mentioned above.
However, we do not recommend that you do not apply the hot glue directly on the fairy lights. Dab the hot glue on the wall, then press the light housing onto the wet glue. This is to avoid burning your fingers with either the glue gun or the hot glue.
How to Hang Fairy Lights Without Damaging the Wall
It’s pretty costly to repair a damaged wall, especially if it’s caused by multiple attempts to hang stuff you want. So here are a few more options to hang your fairy lights without damaging the wall:
- Adhesive tape
- Adhesive Hooks
- If you do not want your tape to be visible, you can simply put a sticker on the tapped end or use decorative tape.
How To Choose and Secure Fairy Lights
Choosing the right size fairy lights can be a determining factor in where to hang and as well as being able to secure them. So here are a few tips on how to do so:
Tip # 1. The size of your fairy lights should be proportional to the object you’re attaching them to. Your Christmas tree lights may not be suitable for other things in your home, like your floating shelf, fireplace, or indoor plants.
- You can opt to choose the ones that have smaller bulbs.
Tip # 2. Hooks, nails, or tacks. These are just some of the choices for putting fairy lights on walls. Nails and thumbtacks are good tools for outdoor use. For indoors, you can utilize adhesive clear or command hooks if you don’t want to damage your walls
- The colour of your thumbtacks or nail should match the colour of the wire for a subtle look.
- Keep the nail or tack in between, and never through the cables.
Tip # 3. Whenever possible, let your wires blend with the background. There’s a reason why Christmas lights have a green wire. So it would blend in with the colour of your tree. Do the same if you want to place these lights on your wall. Find a matching coloured wire or at least one that closely matches the wall so it won’t be an eyesore when your lights are not in use.
- There are black and white coloured wires for fairy lights.
- Gold or silver wires are great for adding visual touches to your wall if you can’t find matching colours.
Tip #4. Plug in or battery-operated Fairy lights. That would depend on where it would be used. There are advantages and disadvantages for each.
- For plug-in fairy lights, you would need a power outlet nearby. If that is not possible, another option is an extension cord that would blend in the background. Plus, you wouldn’t have to worry about running out of battery.
- For battery-operated fairy lights, you can place them anywhere you want indoors. They have smaller bulbs. No unnecessary dangling wires and battery packs can be hidden behind objects. If this is not possible, attach velcros or adhesives so they can be secured on the wall. Avoid having it dangling on the wall, as this can stretch the wires, and it might eventually break.
However, you would have to constantly change your batteries. If you have rechargeable ones, much better. It would save you a lot of extra costs for disposable batteries.
Tip #5. Ensure the fairy lights used outdoors have an IP rating that matches the elements they would be exposed to. It may cost a little bit more than the regular ones, but it will surely last longer than usual. Some fairy lights have an IP67 rating. Which means it’s water and dust-resistant.
- There are solar-powered fairy lights available in the market. The advantages are:
- No need to worry about batteries running out
- It automatically turns on when the sun goes down. And turn it off when the sun comes up.
- Won’t add up to your electricity costs.
Tip #6. You shouldn’t be stuck with just the fairy lights alone. Companies such as ours have people with their consumers in mind. They have gone through the trouble of solving each possible problem you may encounter when setting up your string lights. So, don’t just order any fairy light you come across on the web. Be wise and discerning, choose fairy lights with the following:
- Built-in connectors so you can easily connect one string to the next without worrying about cutting wires or short circuits.
- It can be equipped with a low voltage led driver power supply so you can dim your lights to multiple lighting levels. This helps reduce electricity costs too.
- It can be equipped with fairy light splitters, giving you multiple options on your lighting display. You do not have to worry about going back and forth to get to another spot on your wall. Plug in the fairy light splitter and lay them out wherever you want.
- It can be equipped with lighting extension leads or lighting power leads. No need for extension wires in between or leading to your power outlet.
- It can be equipped with a low-voltage led dimmer remote. A pocket-sized remote lets you control the light setting right where you are at a maximum distance of 15 meters.
Sometimes all your home or office needs are a few fairy lights to light up the mood and create a cozy ambience. So take your pick on the above-mentioned styles and put them to good use should you feel the need to do so.
You can use each for different areas of your home to create a different ambience each time you or your guests walk into another room.
Lastly, if you’re in the middle of your own DIY lighting project and loved any of the inspiration ideas above, get in touch using our contact page! We’d love to collaborate with you.