Do you know how to hang fairy lights on the ceiling? You probably love the idea of installing fairy lights in your room but find it challenging to fix them on the ceiling.
There are good reasons to be apprehensive. One common reason is we do not want to destroy the ceiling. Another reason is it is hard to use nails. To keep your mind at ease, why not check out this article and learn how to hang string lights on the ceiling.
How To Fix Fairy Lights To Ceiling
Fairy lights are mostly seen to decorate your home during the holiday season. But did you know there are more ways to affix or hang fairy lights on the ceiling so your room can be cozy and inviting? The versatility of using fairy lights is almost endless.
8 Ways to Hang Fairy Lights on Ceiling
Zig-zag, an outline, or simply incorporating it on a ceiling fixture, below are some ways how to decorate ceiling with fairy lights.
1. Use Zigzag Pattern

The zigzag pattern is an exciting way to fully illuminate your room, depending on your space. You can use one string fairy light or more. What’s great about Festoon fairy lights is they have built-in connectors, so you won’t have to worry about running short on your lines.
What You Need:
- Tape measure
- Adhesive or screw hooks
- Extension cord
- Drill (if needed for screw hooks)
- String fairy lights
Step 1. Using a tape measure, get the length and width of your ceiling. Afterwhich, you can select the distance between your anchor points on the ceilings. A 2-3 feet distance between points will generate a soft lighting ambience. The closer they are, the brighter your room will be, and vice versa.
Step 2. You can use adhesive hooks. But for a permanent placing, you may use screw hooks. The first hook should be nearest to the power outlet you will use for your fairy light.
If you’re using an adhesive hook, just remove the backing and press hard onto the desired area for 30 secs.
TIP: For drop ceilings, don’t place the hooks on the tiles. Install them on the supports instead.
Step 3. Run the string lights extension cord along the corner of your wall up to the power plug of the fairy light. This is so the light doesn’t hang down to the power outlet.
Step 4. Space each hook along the distance you measure from one side of the ceiling to the other.
Step 5. Do the same on the opposite side of the ceiling, only now move it over half the spacing from the other side instead of lining them up evenly. This will create the zigzag pattern that you are aiming for.
For example, if you spaced the hooks on the first side at 3 feet, you could counterbalance that by spacing the other side by 1.5 feet.
Step 6. String them up. Begin with the hook nearest the power outlet as your starting point. Go across the room to the next hook. You can either sag the string lights or keep them tight, hugging the ceiling. Go around the hook once and cross the room again to the next hook. Keep going until you cover the entire ceiling.
Note: should you have any extra fairy lights after the last hook, just wrap around the last hook so there wouldn’t be any left hanging.
2. Outline the Ceiling with Fairy Lights
Outlining the ceiling with fairy lights will give your room a cozy atmosphere and depth without breaking the bank.
What You Need:
- Tape measure
- Adhesive or screw hooks
- Extension cord (if needed)
- Drill (if needed for screw hooks)
- String fairy lights
Step 1. Outline your ceiling corners with hooks of your choice. Position your hooks at least 2 feet apart until you go completely around. Clips that nail right into your ceiling are also an option if you have a stipple ceiling.
Step 2. Use an extension cord to work your way up to the fairy light power plug. String the fairy light on the first hook.
Step 3. Proceed to the next hook and string it around the same way you did the first. Work your way around the ceiling, hook after hook, until your reach the last one.
Ceiling Design Tips: You can let the string light hang loosely between each hook for a more wavy-like look.
Note: If you don’t want to damage your ceiling, hooks with adhesive backing are recommended. Remove the adhesive backing and press hard for 30 seconds so it will stick securely.
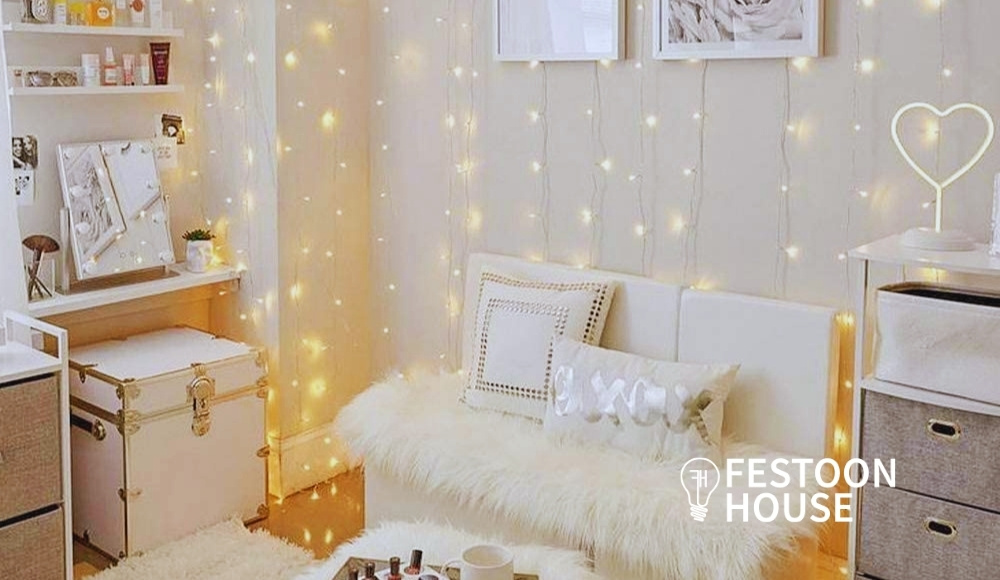
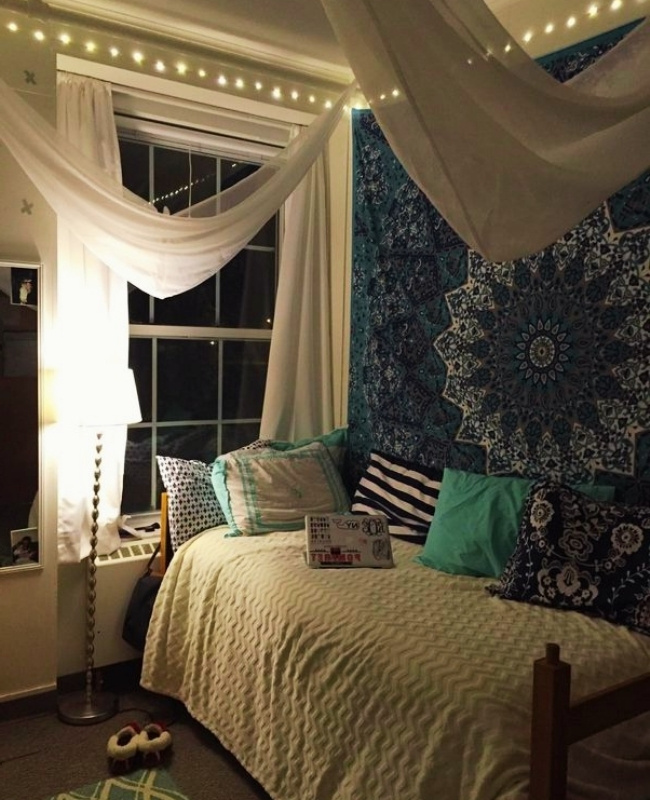
3. Make a Dreamy Hanging Fairy Light Headboard
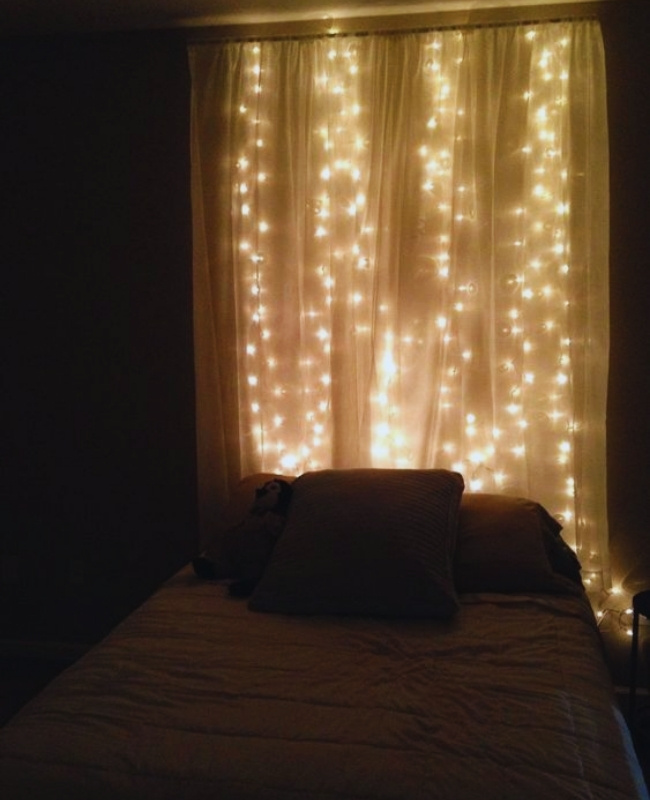
Making a fairy light headboard is beautiful as it is easy to make. Use a sheer curtain to diffuse and soften the lighting effect.
What You Need:
- Tape measure
- Extension cord
- Curtain rod
- Adhesive or screw-on command hooks
- Chiffon drape fabric
- Fairy lights
- Hand saw
- Drill
Step 1. Measure the width of your bed or existing headboard with a tape measure. On your ceiling, it should be right above and a little behind your headboard.
Step 2. With that measured length, cut the curtain rod accordingly.
Step 3. With the curtain rod, place the adhesive or screw command hooks on opposite sides of the rod, leaving a few inches of space on each side. Drill holes on your ceiling only for the opposite side hooks that will hold the curtain rod up.
Step 4. Remove the rod and place smaller command hooks slightly behind where the curtain rod will be. These hooks will hold the fairy lights. Measure each distance according to your liking. And depending on how many string lights you want to place.
Step 5. Starting on the power plug end of the fairy light, string up the fairy light once on each lower level hook and then let it hang down just above the bed’s headboard or depending on your preference. Then slowly go back to the next one until you reach the last hook.
Step 6. When that’s done, insert the curtain rod in the curtain and hang them up. Turn on the fairy light and enjoy your work of art.
4. Create a Canopy Design
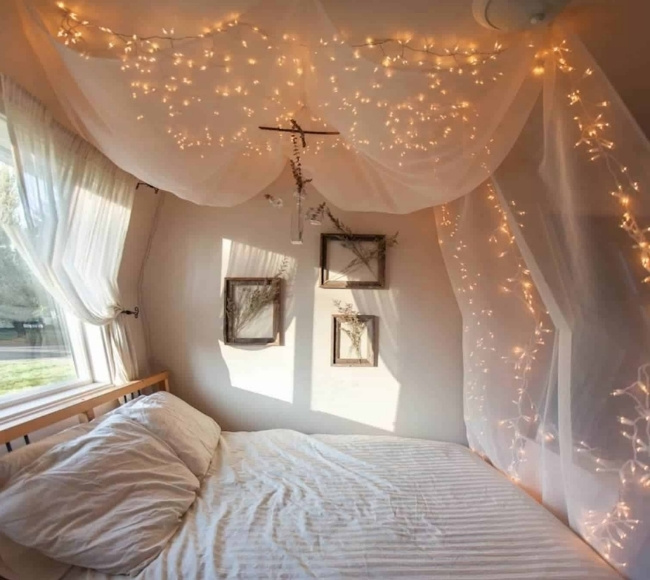
Do you enjoy lying out in the open during a starry night? You can do it yourself every night in your bedroom by creating a canopy using fairy lights.
What You Need:
- Sheer fabric
- Adhesive hooks
- Fairy lights
Step 1. Measure the area above your bed and determine the width of the canopy you’d want to have over it. Include the measurements from the ceiling down to your footboard.
Step 2. Place the first hook where you want to start with the power plug and the one closest to the outlet. String it up once around the hook. The placement of the other hooks can be random, so you could recreate a random starry ceiling lighting canopy. You can either string them up tightly for a more specific arrangement or just let them hang loose.
Step 3. Work your way to the other end of the ceiling and leave a few lengths to drape from the ceiling to the footboard.
Step 4. Place more hooks beyond the fairy lights that will hold the sheer curtains.
Step 5. Attach the sheer curtains on the hooks above the fairy lights.
Step 6. Let the curtain drape over the footboard. You can either secure fairy lights between the bed and the footboard or let it hang.
Step 7. Let the few lengths of fairy lights that you did in step 3 just hang behind the sheer curtain.
Step 8. Plug in the power plug, lie on your bed and enjoy.
RELATED: Fairy Light Ideas: 30 Amazing Ways To Use String Lights At Home
5. Refurbish Ladder as Chandelier
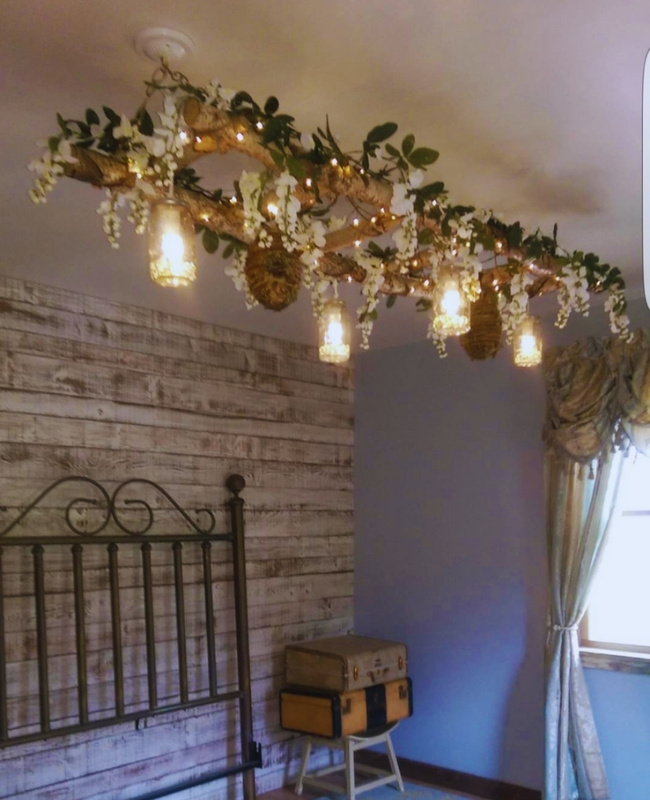
If your room has that vintage farmhouse interior design, installing a ladder chandelier is a great addition to complete the elements. To make the chandelier unique, amp up the lighting design by adding faux vines and fairy lights.
What You Need:
- Old wooden ladder
- Lighting fixture chain
- 4 pcs of 3″ eyelet hooks (or depending on the thickness of the wooden ladder— thicker ladder needs longer eye hooks and vice versa)
- Faux vine
- Fairy lights
Step 1. Prep the old wooden ladder. Clean, dry, sand, and re-paint it as you see fit.
Step 2. Coat the ladder with a clear top coat spray to protect the wood and, at the same time, give it a shiny finish.
Step 3. Drill a hole at the end of each side of the ladder. Make sure the drill bit is smaller than the hook. Then, put in the eyelet hooks. Ensure that it is snugly fitted.
Step 4. Affix a 20″ brass lamp chain at each end of the ladder so it would hang about 10″ from the ceiling.
Step 5. Add the pendant lights to the ladder. Space them out or add more lights on each rung. You can add a mason jar to each pendant light too.
Step 6. When everything has been set up, plug ‘em in.
6. Make Starry Ceiling
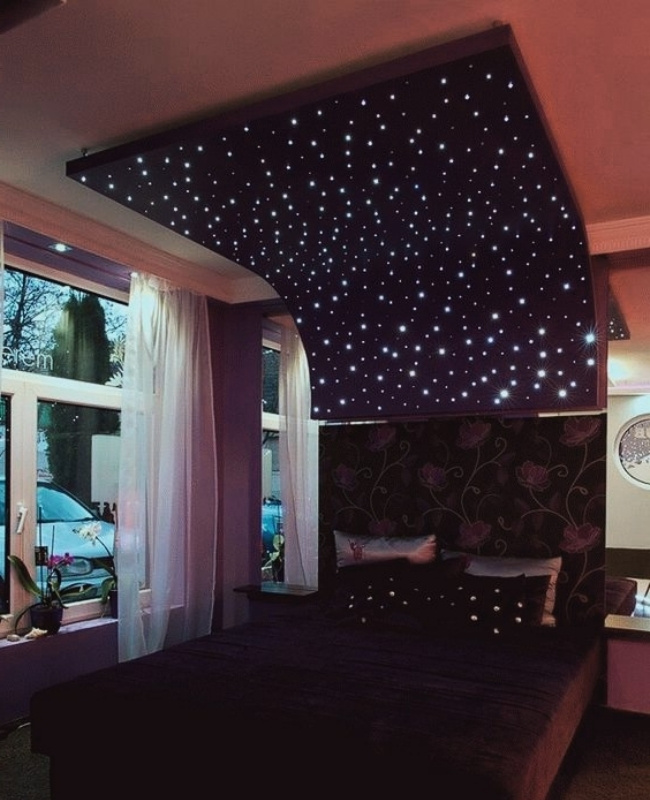
This lighting design is a surefire hit for children. Kids love to turn their room into a magical wonderland.
This is a more complicated type of DIY starry-lit ceiling than the previous one.
What You Need:
- Tape measure
- Plywood, 1/2-inch
- 1×1 wood strips
- Black or blue ceiling paint
- Paintbrush
- Drill
- Pencil
- Drill bit, 1/2-inch
- Eye bolts or Eye hook, 2 inch or depending on the thickness of the wood
- Lipstick
- Fairy lights
- Hot glue gun
- High-temperature Glue stick
- Extension cord
- Claw hammer & 1” Nails / Nail gun
- Hand saw
Step 1. Prepare the ceiling space where you want to install the fairy lights. The quantity and size of the plywood you need will depend on the total area of your room’s ceiling size. The measured area of your plywood should leave only a 1-inch border between the plywood and the corner of your ceiling.
Step 2. Place 1/2-inch plywood pieces on a smooth work surface.
Step 3. Paint the exposed surface of the plywood you will be using with black or dark blue paint. Let it dry till the next day. Paint over another coating if the need be.
Step 4. When the paint is dry, turn the plywood over and randomly mark the spots where you want to insert your fairy lights. Space them at 1.5 inch apart or depending on your preference. Keep an inch of spacing near the edges of the plywood that will serve as a visual border.
Step 5. Using your drill inserted with the 1/2 inch drill bit, start drilling holes through each end of the markings.
To prevent wood splinters on the exit hole, use a piece of scrap wood or plywood to block the splinters.
Step 6. Either multiple plywoods or just one, start placing the 1×1 wood strips on the borders and nail them together. This will be like a frame for the sheets to put as one piece. Saw them according to the length of the borders and across each meeting plywood sheet.
Step 7. Start screwing eye bolts on the upper side of the 1×1 wood frame that faces the ceiling. Space them 6 inches apart or as desired.
Step 8. Using the lipstick, apply it to the tips of each eye bolt. Place the finished sheet on your ceiling. Make sure it’s centred. Then, press the sheet hard against the ceiling so that the lipstick leaves a mark.
Step 9. Screw in an eye hook to each of the marks on your ceiling.
Step 10. Insert the fairy lights bulbs one by one into each of the holes you drilled on the plywood. Start with the hole nearest the power outlet you will be using. Let it poke through just enough for the plastic holder can be seen. Ensure the bulbs aren’t in contact with the woods’ surface for fire prevention.
Step 11. Glue around the exposed parts of the plastic holder to keep the bulbs in place.
Step 12. With the painted side faced down, insert each hook to the eye bolts to suspend the plywood sheet on your ceiling.
Step 13. Plug in the extension cord and let it run along the corner of the wall up to the power plug of your fairy light.
Step 14. Lie down and enjoy the simulated starry night sky in the comfort of your own bedroom.
Things to Remember when you make starry ceiling:
- Double check the fairy lights for any exposed wires before using
- Make sure that every fairy light bulb is functional before you install them into the plywood.
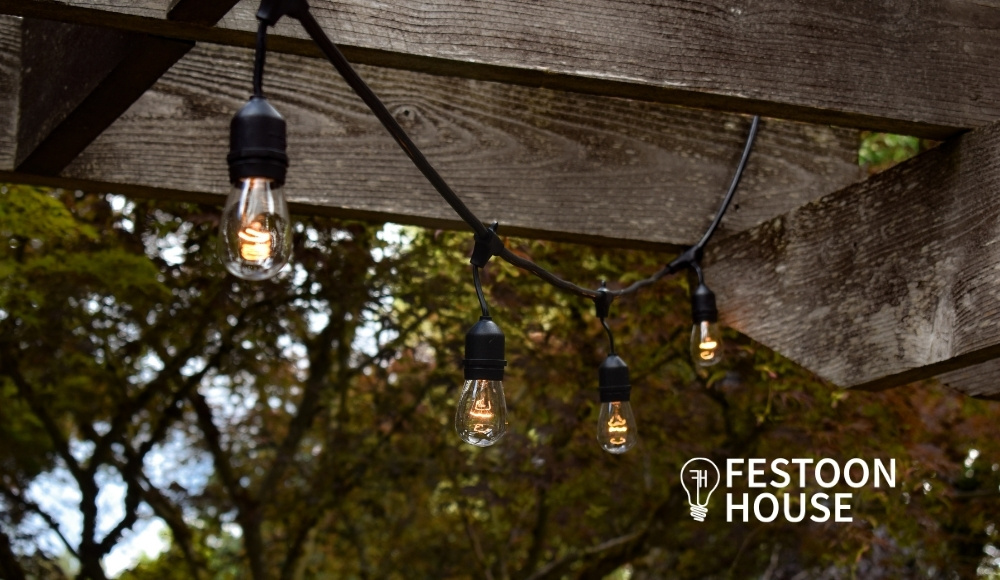
7. Drape String Lights
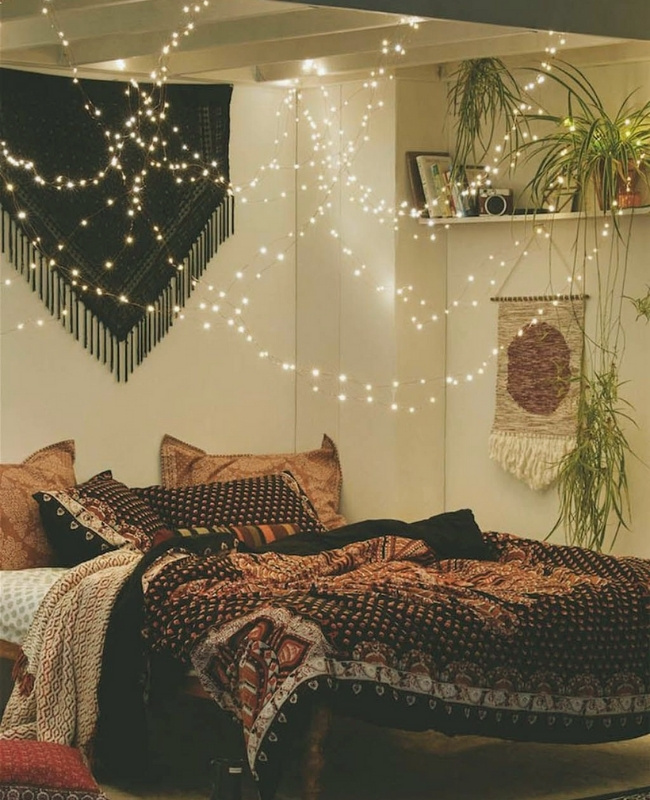
How to drape lights across the ceiling? You do not need to think hard about this lighting, as this will become an abstract design for anyone who wants to do this. Now, the best part of this fairy light visual design is perfect for a more relaxed and informal look. You can just let it drape from your ceiling.
What You Need:
- Adhesive Hooks
- Fairy lights
Step 1. Start placing adhesive hooks from one side of the ceiling and then also on the other end. One that’s in line with your bed. Or you can choose to outline your ceiling from end to end.
Step 2. Start your fairy light from the power outlet and work your way up to the nearest hook on the ceiling.
Step 3. String it up around the hook and then let it sag for about 15 cm more or less, depending on your preference. Randomly work your way up again to the next hook:
- You can have 2 sets of hooks lined up from one end to the other or 3 sets, with one set between each. If you have 3 sets of hooks lined up, let it sag from hook-set 1 to hook-set 2, leading up to hook set 3.
- You can either have it on a double wave-like pattern by working your fairy light in line with each other, or you can jump from one random hook to the other. Crisscrossing here and there for a random result.
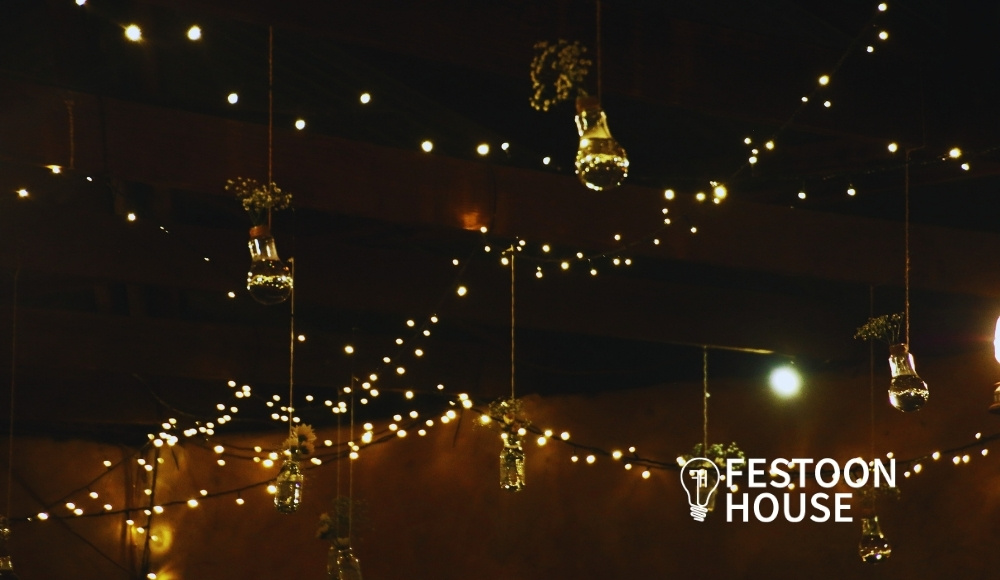
8. Maypole-tent-like Starry Ceiling Lighting
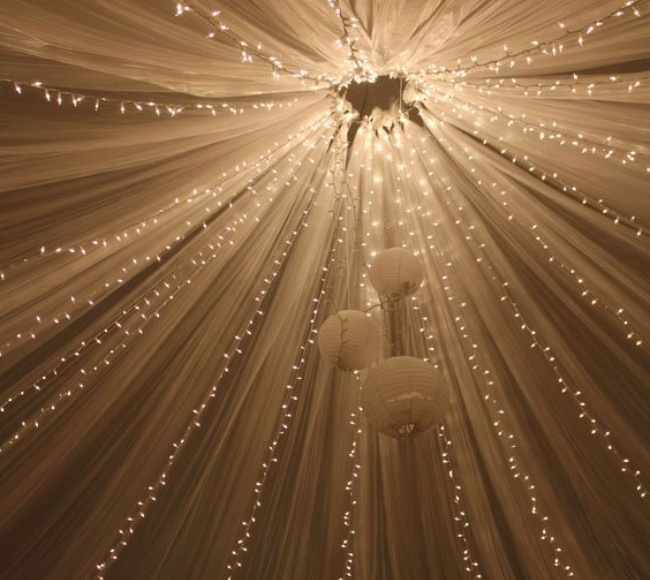
A canopy of starry lighting is the whole idea of affixing string lights on the ceiling. However, instead of attaching the fairy lights in a zigzag pattern or draping them randomly, a maypole-like design is another way to add personality to your space.
This design also gives a relaxing and romantic vibe. You can add this at the centre of the living room, just above the bed or dining table.
In addition, this lighting design is not only great indoor decor but is also perfect for weddings.
What You Need:
- Adhesive Hooks
- Fairy lights
- Hoop ring
- Ivory ceiling drapes
- Brass lamp chain
Step 1. Before buying your fabric and lighting kit. Measure first the area where you want to hang the drapery and string lights from the centre point to the ceiling edges where you will hang the fabric and light strings. By doing so, you will know the length of the fabric you need, including how many lights you should buy.
Step 2. Once you have all you need, you can begin by tying the other end of the fabric to the embroidery hoop.
Step 3. Once the fabrics are tied around the hoop, start attaching the end of the fairy lights to the hoop.
Step 4. When all the fairy lights are secured to the hoop, attach the brass lamp chain at one endpoint at the centre of the hoop and then to the other endpoint.
Step 5. Anchor the hoop to the ceiling. Once done, hang the other ends of the sheer fabrics to the other end of the ceiling, creating an arch design. Do the same to the fairy lights. Hang each end following the same arch direction of the fabric.
And that’s it. Plug and enjoy!
TIP: For amp-up design, you may add a chandelier or some lantern lights at the centre of the maypole-like tent.
FAQs When Hanging Fairy Lights on Ceiling
How Do You Hang Fairy Lights on Ceiling without Nails?
Nails can leave nasty holes in your ceiling. It can be a lot of work to cover them up. It’s good that multiple tools are available so you can hang your fairy lights on the ceiling without nails.
These are as follows:
- As mentioned above, you can use adhesive clips or hooks. These come in different sizes and can hold more weight.
- Wrap them around beams, chandeliers, or other fixtures hanging from the ceiling.
- Use transparent double adhesive tape.
- You can also use adhesive putty such as Blu Tack. These reusable adhesives can support light objects.
- Wrap them on a curtain rod and work your way to the next curtain rod.
- Use transparent sucker hooks or suction cups when glass windows get in the way when hanging string lights from the ceiling to other parts of the room.
- Drape them on furniture. This is your best alternative if you can’t hang on the ceiling.
How Do You Hang a Ceiling Light without a Drill?

As long as the lights you intend to hang are lightweight, you can use heavy-duty adhesive command hooks. There are multiple designs that you can choose from. There are small and big ones. Some even have rotational designs, so you can adjust them accordingly to the direction of your fairy lights.
How Do You Hang Things from Ceiling without Hooks?

How Do You Secure Fairy Lights on the Ceiling?
To securely hang fairy lights on the ceiling, it is best to put hooks around the border of your ceiling every 2 feet or 61 centimetres. Also, press firmly against the ceiling for 30 seconds when adding adhesive hooks.
How Do You Hang Fairy Lights without Damaging Paint?

One apprehension about hanging fairy lights on the ceiling is that this might damage the paint. So how do you hang fairy lights without damaging the paint? Aside from those options mentioned above, use a hot glue gun to attach fairy lights to the ceiling. Hot glue gives superior hold and will not damage the semi-glossy or glossy paint.
In addition, when you plan to remove the glue, soak a cotton ball with rubbing alcohol. Gently rub the cotton around the glue to loosen its hold. Then, scrape the glue away from the ceiling.
I’m sure there are many ways to hang your fairy lights on the ceiling that you can find on the web. We have just come up with a few lists for you. Take your pick and make the most of every list.
Lastly, if you’re in the middle of your own DIY lighting project and loved any of the inspiration ideas above, get in touch using our contact page! We’d love to collaborate with you.